Cobble it together and gobble it up!
Showing posts with label Homemade Gifts. Show all posts

Thursday, 18 July 2013

Re-purposed Cot to Garden Bench

I am feeling quite self satisfied! There is no better felling than a successful re-purposing! I took the side off the boys old cot, and reinforced the base. I painted it with Shades outdoor paint, scattered with cushions and bobs your uncle a garden bench for two!

Monday, 1 July 2013

Cake Pop Wedding Cake


This is the result of the conversation I had with a good friend nearly 2 years ago. It was at Charlie's christening when she tried her first ever cake pop and it blew her mind and she said 'promise me, if I ever get married, please can you make these as my wedding cake?' And I foolishly agreed! Little did I know there was no such precedent on the internet to copy! So I had to wing it and I nearly pooped my pants with the stress of it!
Not only was it the wedding cake it was also the dessert!
So I made 277 chocolate cake pop truffles (no sticks!) coated in either white, milk or dark chocolate. I used Rachel Allen's chocolate cake recipe from her Bake book for the base recipe.
I made them in batches - not all at once! And froze them.
They defrosted on the drive to the venue ready for assembly.
Then I was winging it completely! I made a cone out of silver thin card, it had a slight sheen to it. I put it on top of a cone shaped vase to give it additional support in case it fell in under the weight of itself. This wasn't necessary.
Then I assembled by sticking them on the cone with the correct coloured melted chocolate, starting at the base and working up. As it dried they were stuck fast. I filled in the gaps with some of the bridal flowers.
And gave it a feature at the top to finish it off!
It didn't use 277! It probably took about 120 so I could have gone bigger but I wasn't sure and didn't want to risk it. Fortunately it worked well like that anyway. There was enough for everyone to have pudding without disturbing the cake. Late in the night, after the partying, the odd pop started to be yanked off the 'cake' as people walked past!
If I did it again, I think I would make different size pops so that I could work down to the smaller ones near the top.


Sunday, 10 March 2013

Homemade Gift - Sightly rubbish (but made with lots of love) macaroons for Mothers' Day.

I decided to make macaroons/macarons for Mothers Day. I followed this recipe from Macaron fetish blogspot. I made one big batch and sub divided into multiple colours to make a rainbow of flavours.
These included;
Pink with strawberry jam
Pink with rose water scented white chocolate ganache
Orange with marmalade
Orange with orange flavoured dark chocolate ganache
Yellow with lemon curd
Uncoloured with speculoos paste
Uncoloured with almond flavoured white chocolate ganache
Uncoloured with almond flavoured white chocolate ganache and raspberry jam (bakewell tart flavour)
Uncoloured with toasted coconut sprinkle and coconut flavoured ganache
Blue with raspberry jam
Light green with mint flavoured dark chocolate ganache
Light brown with coffee flavoured chocolate ganache
Brown with chocolate ganache

I think I was over ambitious for a first time macaroon maker! Some worked and got 'feet' and didn't crack or fizzle or stick to the parchment! Most Did Not! But.... they did taste good non-the-less. They just had 'faces only a mother could love' which was just as well!

Monday, 11 February 2013

Home Sweet Home. Wool wrapped wall decoration


Following a Pin - spot (see here) for a kids DIY Yarn Font. I decided it was just the thing for a blank space in the dining room just as you come in the front door. I have been wanted to do something like Home Sweet Home or Welcome to our Home and this seemed like just the thing.
I didn't do it exactly the same way. I didn't have any wire and I knew pipe cleaners would not be long or strong enough so I used my new found, favourite, lightweight, modelling material..... scrunched up aluminium foil.
Then super simple - tied on scraps of wool/yarn and wound it round and round. I then stuck it to the wall using command strips. And I LOVE it. It is my new favourite thing in the house. It is so colourful and homespun, it can't help but raise a smile and make me feel all warm inside everytime I see it.


Saturday, 8 December 2012

Magic Reindeer Food

Another Christmas Fayre/Fair make. This one is an annual make. I made the label myself as I couldn't find a printable that was quite right. They are the usual mix of oats and glitter wrapped in cellophane.

Tuesday, 4 December 2012

Santa's Magic Key

I made these for the school Xmas Fair/Fayre for fundraising purposes. I got the free printable here. It was the nicest one I could find, although a little American with the cookies but I think they went down well.
I bought the keys Wilkinsons. I didn't intend to buy them as I thought I had a whole pile of old house keys from various residences but no idea which! Turns out I don't have as many as I thought. But these decorative keys were quite bargainous and nice and old fashioned and weighty.


Friday, 30 November 2012

Baby Quilts

I have been very, very busy beavering away making a couple of baby quilts for two very close friends who have both had gorgeous bouncy baby boys. Here are some pictures of one of them.
I made it double sided (in the hope they would like at least one side) and used the clouds as the quilting lines.
I saw the phrase 'Eat, Sleep, Play, Repeat' somewhere when Charlie was a tiny baby and it really resonated with me as being exactly what it is all about! I was very excited to find that a new quilting shop opened in Grantham just a month or 2 before we moved here. I found some great fabrics and can't wait to have another reason to visit. 


Friday, 10 August 2012

Personalised papercut wedding gift


Although I am very happy to buy a gift from a wedding list, I think if you are a key participant of the wedding party (like the best man) it is important to give an additional gift which is a bit more personal. I know some of our most memorable gifts where the ones with a home made element.
So I decided to have a go at doing a papercut in the style of Rob Ryan who is one of my current favourite designers. I have been meaning to have a go at papercutting but was sure it would be super tricky. Turns out it is simpler than it looks all you really need is a nice sharp scalpel & a bit of time!
I am quite happy with the result. I hope the bride and groom like it. I have put it in a frame but I don't mind if they just put it in a scrapbook or photo album.
After we have moved I am very tempted to use this technique for the family tree I have been wanting to make for ages. We will see!

Friday, 13 July 2012

The Park Farm Cookbook


Granny is now a published celebrity chef!

For her birthday we created a photobook of all her most loved family recipes. I am please to say that she seems very chuffed with it! It is available for purchase here!!!!

I just love photobooks and all their home made and personalised gift potential.

Friday, 6 July 2012

Nursery Teacher Gift Idea


Teacher gifts are always tricky, and when it's nursery it's even trickier because there are lots of them!
 My friend is a primary school teacher and when asked what her preferred end of year gift was she said "Wine is always the winner, you can't go wrong because even when it isn't very nice you can always cook with it!"
So I give wine to the primary school teachers, but it felt a bit wrong to walk into nursery with 3 bottles of red! So I started thinking along the sweet treat line, but thought that they probably get overwhelmed with sweet treats all in one go, and had a eureka moment of making them some cookie dough that they can put in their freezer and slice and bake as the urge comes to them.
I used my best chewy cookie dough recipe (find it here) and made three flavours, cinnamon oaty raisin, peanut butter choc chip and mint choc chip.
I hadn't made the mint choc chip ones before so I had to use trial and error a bit. I made the basic choc chip (though you could use mint flavoured chocolate) and then added a bit of peppermint essence (about 2tsp) and a bit of my new paste colourings to make the perfect vivid green!!!
On a side note, I am so excited that I finally got around to getting professional paste food colourings for baking. They have changed my life - well, maybe that is a bit of an exaggeration, or maybe not - my life is truly that sad!) They are such amazing value for money as you use just a tiny spec and get more colour than you get from a whole bottle of the stuff you get from supermarkets. I got mine here. I only bought yellow, red and blue as you can mix to make any colour yourself.
I dressed them up with a little poem we wrote to make it more personal and some baking/storage instructions. We did get some funny looks as we walked in with them on the last day, and some mothers asked me why I had made a green sausage but the teachers were absolutely delighted with them. I'm not sure who picked which but I think I can guess based on their three personality types!

Friday, 27 April 2012

Monster teddies

As there are only a few kids coming to Max's Monster birthday party I thought I would make them each a Monster stuffed toy to take home instead of a party bag filled with crap they don't need and stacks of sweets!
So here they are...
Meet the Monsters!

The idea came from a stuffed toy a friend bought Ollie 6 years ago. I think it was called an Ugly Doll.
The ones I made are made from acrylic felt and the hollow fibre stuffing from a pillow. I just hope they hold up to the battering they get. Surprisingly all three of my boys love them. I was sure the 6 year old would think they were too babyish but he wants me to make him one too!
There will be a few more 'monster' posts over the next couple of days as plans for the party come together...


Wednesday, 22 February 2012

More felt food

I didn't quite manage to finish everything I set my heart on making in the last felt food post but I did quite well.
Here are some pictures.

Felt sesame seed bun and burger
Felt bourbon biscuit


Felt Pizza components
Felt four seasons pizza


Felt hot dog bun with sauces
Felt tomato slice


Tuesday, 7 February 2012

Diamond jubilee - making a gift for the Queen

So today was the Queen's Diamond Jubilee, which made me think about when I made the Queen some napkin rings from toilet rolls for her 60th birthday (so I was 8!) and bless them they sent me a lovely letter of thanks. Mum still has it somewhere I think. It's typed and signed from a lady in waiting on lovely headed paper. It was my pride and joy for ages! I wonder if the Queen still uses the toilet roll napkin rings - I imagine she does!?
So I got to thinking maybe the boys could make her a present for her 60th Jubilee. We had a chat about what the Queen might like and after I explained that if I had some big diamonds I probably wouldn't be sending them to the Queen, we thought she might like something to put in her garden.
So we made these....
what on earth are they I hear you ask?

They are diamond shaped bird feeders, that both look lovely hanging in your tree (!?) and serve a practical use to feed the birds!
We made them with 4  lolly sticks, glued to make a diamond, then coloured with permanent markers (so as not to run in the rain) and then the other side spread with peanut butter and dipped in bird seed!
Will she like them?? We will see!!
Once Ollie has finished writing his letter to accompany them I will get down to the Post office and send them off to Buckingham Palace. I just had a thought.... I'd better put a warning on the envelope not to be opened by anyone with a nut allergy - the last thing we want is to be done for high treason  -plotting to kill the Queen with mailed peanut butter!


Friday, 27 January 2012

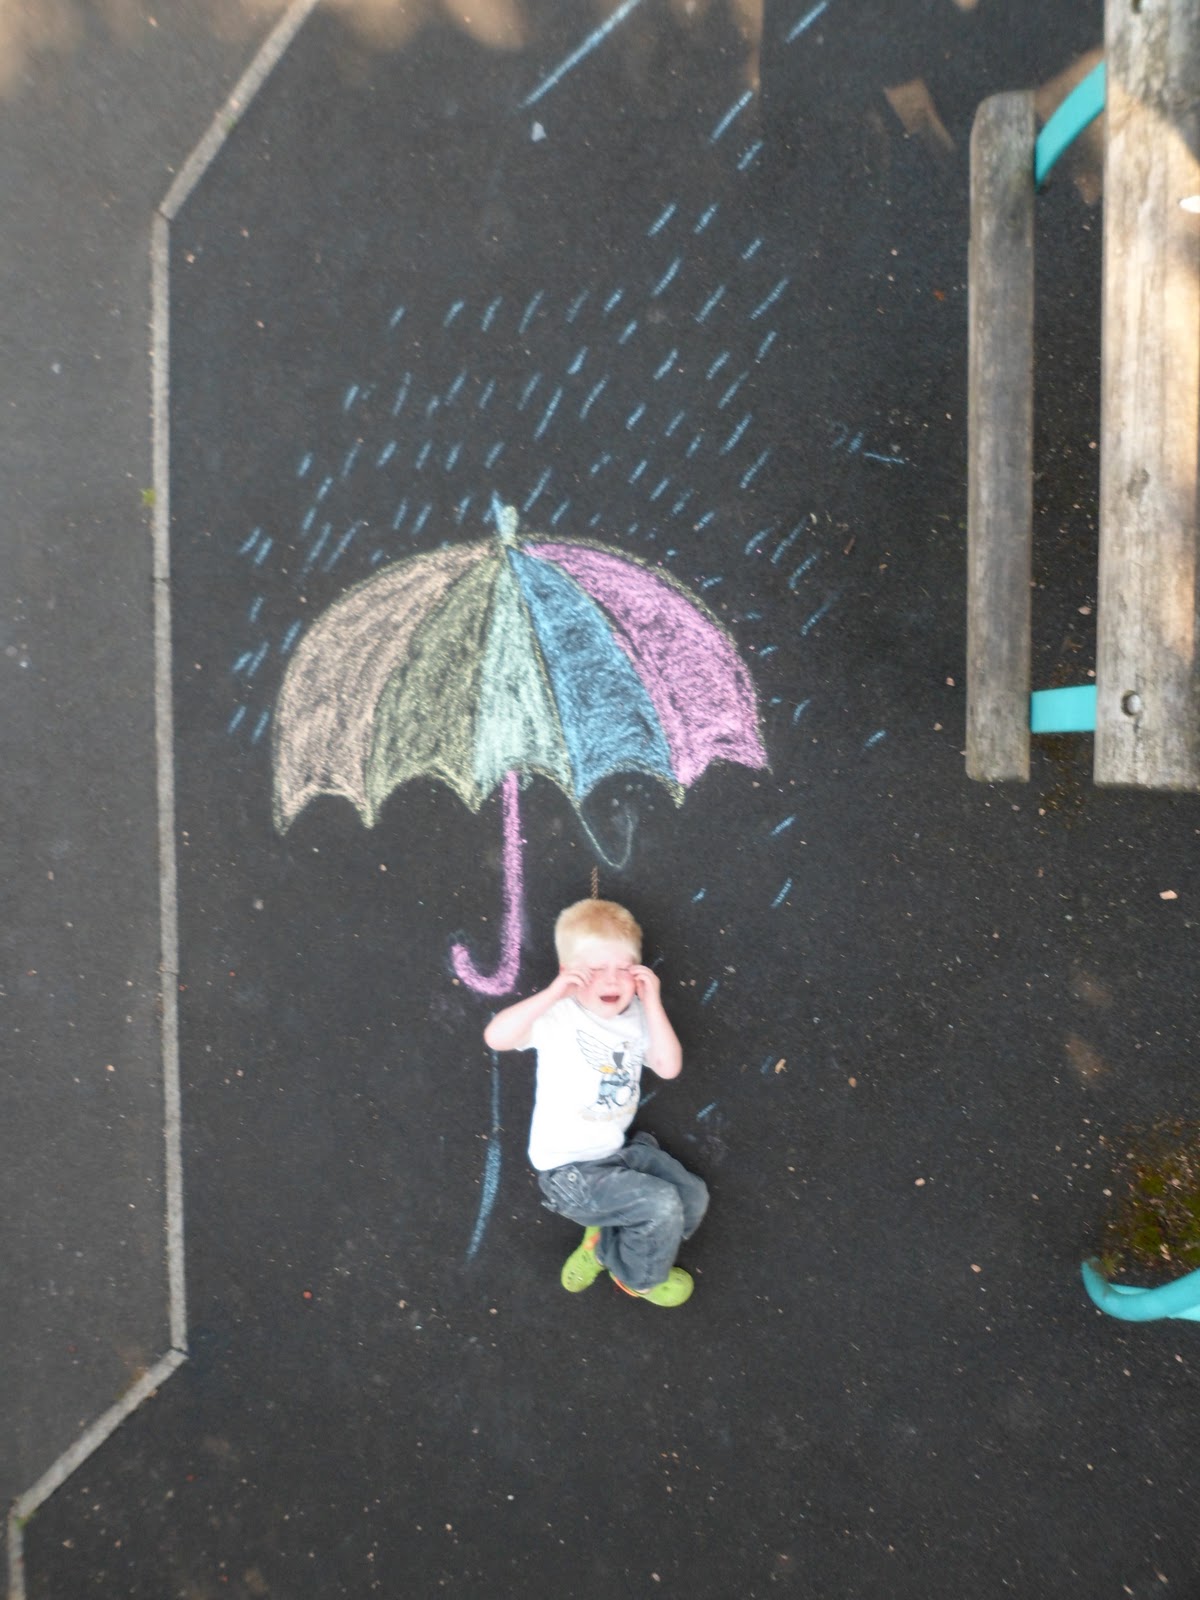
One last homemade present - Calendar

We made these photos in the summer at the playground on our road with jumbo chalks and used them to make a photobox calendar for the Grandmas. Some worked better than others! Here are the precropped versions...


W

Saturday, 14 January 2012

Homemade Gift No. 6 - Plant pot come house name plate

I made these for our mums. Quite a simple make but I hope it's the concept that is biggest success.
Using a plant pot, outside your door to double up as a house name plate.
I used acrylic paint and permanent marker. There is an element of suck it and see to this concept, I am hoping the decoration will be weather proof alone, but we will see. If not I guess you could varnish it but that would ruin the matt, natural effect of the terracotta. We will see.

Friday, 13 January 2012

Homemade Gift 5 - A Barbie clothes storage/wardrobe


I made this for my nieces as well. They are just getting into Barbie's, which were my utter obsession as a child and I am so excited they like them too! I wanted to get them some more clothes and then the thought occurred to me (similarly to the hairclips yesterday) that the Barbie clothes situation causes huge storage issues. I remember from personal experience, that Barbie's 'wardrobe' (in fact I had a Sindy wardrobe) is all but useless - nice to look at but useless to hold clothes. And shoes and accessories all get lost otherwise. i spent ages surfing the net to see if the good people of mattel had come up with a solution. But they don't seem to have.
So I came up with this solution. I found a fold out storage (the type you use for screws etc) box in my local pound shop and thought the compartments would be great for the bits and bobs, and the base bit big enough to hold a decent amount of clothes.
It was plain and utilitarian looking so I got some pretty sticky back plastic and lined the compartments and then spent a while cutting out decorations for the front. 

Thursday, 12 January 2012

Homemade Gift No.4 - Hairclip organiser

I made this gift for my nieces, mainly because I wanted to buy them loads of cute little hairclips and thought that would be a bit boring to open and a bit of a bind for my sister to find somewhere to put. So I made this so they can add all their other hair clips to it and hang it on their wall with them all ordered and organised and in one place.
I used a frame from a picture I got in a charity shop. I took out the middle glass, picture and backing and painted the frame pink. I staple-gunned ribbons in colours that coordinate with their bedroom in vertical stripes. I did a stripe for red, pink, orange, yellow & brown, green, blue & purple. I also put a hook on with a couple of necklaces hanging and used a pipe cleaner (which can be unhooked from the top) to put hairbands on.
Monday, 26 December 2011

Homemade gift No.3 - Thread bind bangles


I made these little token gifts for my dear friend. I used some ancient old bangles I had knocking around, some embroidery thread and some pritt stick. All it takes is some patience to sit and carefully bind the thread around the bangles. I put pritt stick on the bangle to help hold the thread in place. I also ended up using a little bit of superglue on the end piece after I had knotted it off. 
This idea has a lot of future potential. I really enjoyed the effect once I got a bit more creative with the colour striping. The possibilities are endless in terms of colour combinations! I hope they liked them. I am always really embarrassed when I give a home made gift. But I hope they appreciated the sentiment, and I chose colours that really reminded me of them to make it more personal.
A very satisfying way to make something from nothing.


Related Posts Plugin for WordPress, Blogger...